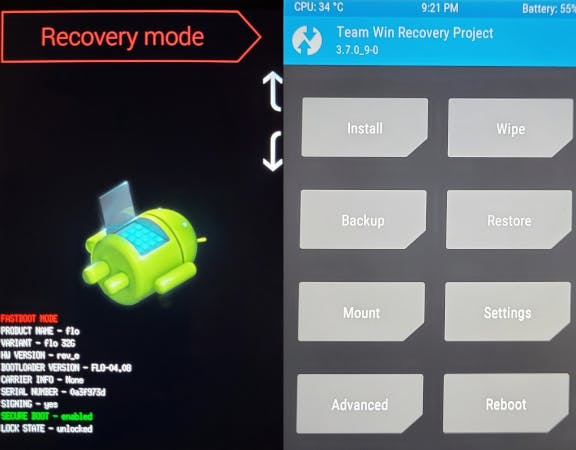
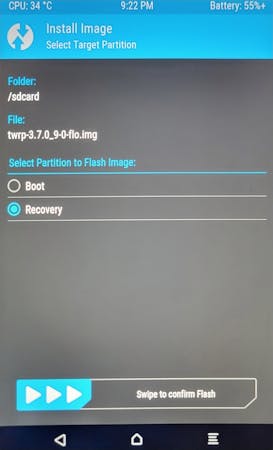
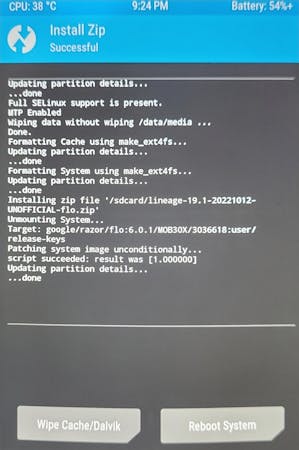
I have an old Asus Nexus 7 2013 tablet (codename flo) which is still serving me well ten years on, but occasionally I decide I want to put a newer LineageOS ROM on it, or generally reflash it. Unfortunately, I do this sufficiently infrequently that I can't remember how to, so I wrote myself this guide.
My device has previously had an additional Vendor partition created (so technically it's a flox device rather than flo). That means some more space has been made for some things, but it also means tools like repit won't work for adjusting the size of partitions (see this XDA Developers post for more on that). YMMV - that's mainly a note to me!
See here for download links for the ROM I used (should be a zip file): https://forum.xda-developers.com/t/rom-flo-deb-unofficial-lineageos-19-1-2022-10-12.3569067/
You'll also want to download OpenGApps (the Google App suite) from that post. You want the pico variant (nothing else will fit) and arm not arm64, for the corresponding Android version to the copy of Lineage you installed (so aos12l at the time of writing).
If you want root access, you'll need a Magisk APK. The forum post where LineageOS came from should list suitable Magisk versions, but you'll need to download it from https://github.com/topjohnwu/Magisk/releases.
Finally, assuming you've already installed TWRP recovery, you might as well go ahead and update that while you're here. Head to https://twrp.me/asus/asusnexus72013wifi.html, scroll down to Download Links and choose a suitable mirror, then download the latest .img file.
Copying the Files
Once you've downloaded everything, go ahead and reboot the tablet into recovery by turning it off, then holding down the Power and Volume Down keys. Once it starts up, use the volume control to choose Recovery as an option, then push Power to boot.

Connect the tablet to your computer: it should mount automatically in the usual way. Then go ahead and copy the files to the root of the tablet.
Upgrading TWRP

Select the Install button
Go to Install Image bottom-right
Select the
.imgfile for TWRPChoose Recovery as the partition to flash
Swipe to confirm flash
Go back to the main screen, select Reboot and then Recovery
Installing LineageOS and OpenGApps
Select the Wipe button on the TWRP home screen
Swipe to Factory Reset
Go back to the Wipe screen, select Advanced Wipe
Select System, then swipe to wipe
Go back to the TWRP home screen
Select the Install button
Find the LineageOS zip file, select it
Swipe to install
Find the OpenGApps zip file, select it
Swipe to install
Reboot into the new system
When you're asked if you want to update Recovery with Lineage, don't tick the box: otherwise, it'll just overwrite TWRP for you, which is probably not what you want!

Installing Magisk
Once booted and you've done the initial setup, find the Magisk APK you downloaded earlier using the Files app, and install it.
Then you'll need to install Magisk itself, by following the instructions at topjohnwu.github.io/Magisk/install.html. Note that this device does not have a vbmeta partition (it'll save you a step).
Unzip the LineageOS zip file from earlier, to extract the
boot.imgfileCopy this to the tablet
Open the Magisk app, push the Install button
Leave the vbmeta option unchecked and push next
Choose Select and patch file, and find the
boot.imgfile you copied in step 2Push Let's Go
Shut down the tablet and reboot into recovery (power on with Power and Volume Down again)
Select Install, then Install Image
Find the
.imgfile Magisk created in the Download folder and select itSelect Boot and swipe to confirm
Reboot system
(Re) Flashing TWRP
If you need to flash TWRP to start with or like me, you made a mistake and let LineageOS overwrite the recovery the first time, you need to run fastboot flash recovery twrp.img and then fastboot reboot (and then hold Power and Volume Down to get back to the bootloader and TWRP). If you have Docker and are on a Linux system, try these with the container at https://github.com/mparker17/docker-fastboot to save mucking about installing the ADB tools.